Tuesday, July 13, 2010

Scanography with Borders


4x6 Blend


8x10 Blend

For this border effect I used the flexible brush tutorial to create that brushed on effect. After I got it how I wanted it to look I added a rectangle box and put a stroke on it. I wanted the colors to match and tried to get it as close as I could. I thought it turned out well.

Scanography

One Scan

This is my one scan image. I layered a bunch of my jewelry on the scanner and left the lid open. I turned off the lights so was able to get the black background. I liked how the scanner made little shine marks on a couple of pieces of jewelry. I boosted the contrast a little in camera raw.
1. Jewelry: July 12th, 2010; 7:00.; Rexburg, ID; Epson Scanner


1. Big Rocks: July 12th, 2010; 7:10.; Rexburg, ID; Epson Scanner
2. Little Rocks: July 12th, 2010; 7:25.; Rexburg, ID; Epson Scanner
1. Flowers: July 12th, 2010; 7:35.; Rexburg, ID; Epson Scanner

Blend

For this blend I use an overlay blending mode to combine the little rocks and big rocks. Because I used a plastic covering over the scanner so I wouldn't scratch the scanner, I boosted the contrast and warmed up the temperature in camera raw. By boosted the contrast, I kind of got rid of that plastic glare.
For the flowers I used the quick selection tool in Photoshop to select the flowers. I just drug the flowers over on top of my rocks. I thought it turned out nice.

Tuesday, June 22, 2010

Fine Art Template


1. Cellar. 6/12/09 9:50 pm, Rexburg, ID. f 9, shutter speed 30 seconds, ISO 100, Canon 7d.


2. Cellar. 6/12/09 9:50 pm, Rexburg, ID. f 9, shutter speed 30 seconds, ISO 100, Canon 7d.

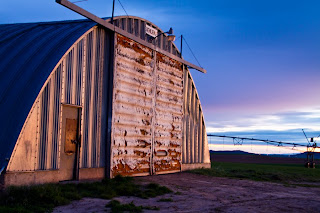
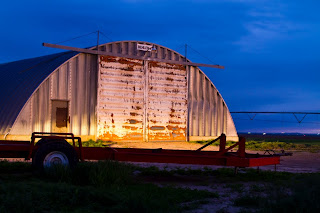
3. Farm. 6/18/10, 9:00, shelley, ID. f 5.6, shutter speed 1/125, ISO 200, Canon 7d

4. Farm. 6/18/10, 9:00, shelley, ID. f 5.6, shutter speed 1/125, ISO 200, Canon 7d

I liked this assignment. It was very cool. For the first picture there wasn't any edits done. I just inserted it into my template and used a clipping mask to insert it in. For the second picture I did a little levels, contrast, boosted the vibrance and clarity. I shortened my rectangles because I wanted to see what it looked like and I thought it turned out nice.

Monday, June 21, 2010

Photolusion


1. cloud. 6/19/2010, Shelley, Idaho 2:45 pm. f/22. shutter speed, 1/250, ISO 320, Canon 7d


1. Love. 6/20/10 - 8:00 pm Rexburg, Idaho. f4, shutter speed 1/100, Canon 7d, ISO 500

Photolusion Straight


I guess I was in cloud mood when I took these picture.

For my Photolusion Edited shot I wanted the clouds to look like they were spelling a word. I chose the word LOVE because I had a sign that said that but.... yeah. I cut out the word love and then drug it over to my cloud picture. I used the clone stamp to erase the part of the cloud where I wanted love to read.

For my Photolusion Straight shot, I thought that this wispy cloud kind of looked like mist. So I wanted the cloud to look like mist coming out of my perfume bottle. It wasn't a perfect cloud but I thought it turned out ok. I didn't do any edits to this picture besides a little levels.

Tuesday, June 15, 2010

Edge Effects


1. cellar, 6/13/10, 9:30 pm, Rexburg, ID. f9, shutter speed 30 sec, Canon 7d, ISO 100
2. Balmforth Family, 6/12/10, 11:00 am. Rexburg, ID. F8, shutter speed 125, Canon 7d, ISO 100
3. Rhya, 6/12/10, 11:30 am. Rexburg, ID. f8, shutter speed 125, Canon 7d, ISO 100

The picture of the cellar is unedited, I just decided to do an edge effect to it.

I took my sister-in-laws family pictures and I thought it would fun to do a couple of edge effects to these picture. Because the background of the pictures were white, I put black in the background.

Edge Effects

Night and Lights


1. Streaks. June 14th, 10:30pm. Rexburg, ID. f4.5, shutter speed 30 sec, Canon 7d, ISO 1000
2. Swirls. June 14th, 10:15 pm. Rexburg, ID. 4.5, shutter speed 30 sec, Canon 7d, ISO 1600
3. Cellar. June 12th, 9:50 pm, Rexburg, ID. f 9, shutter speed 30 sec, Canon 7d, ISO 100
4. Cellar and car lights. June 12th, 9:45 pm, Rexburg, ID. f10, shutter speed 30 sec, Canon 7d, ISO 100

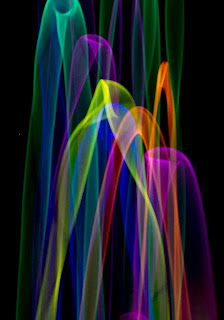
The light painting were really fun to do. I went and bought some glow sticks (bracelets), which gave them that circular feel. The first one I just threw them in the air and let them fall down and the second one I was actually holding them and swirling them around.

For the first outside picture, I did a 30 second exposure and just thought the last of the sunset was hitting the front of this cellar really neat. The second one I turned on my car lights for about half of the exposure which gave it that glow.

Tuesday, June 8, 2010

A Photo A Day Template


I didn't have time finish my custom template so I used one of Sister Esplin's for now. I really like how this one is laid out but I'm going to make sure that my horizontal pictures are long enough to show the detail of my images.

Monday, June 7, 2010

Weekly Photos


1. Buds. Tuesday June 1st, 2:20 pm. Gardens, BYU-I; f5.6, shutter speed1/200, Canon 7d, ISO 100
2. Old Car. Wednesday June 2nd 6:30 pm. West of Rexburg a long ways on a random road. f5, shutter speed 1/200, Canon 7d, ISO 100
3. Blossoms. Thursday June 3rd 2:00 pm. Rexburg, ID. f11, shutter speed 1/250, Canon 7d, ISO 400
4. Flag. Friday June 4th 9 pm. Shelley, ID. f5, shutter speed1/60, Canon 7d, ISO 3200
5. WindMill. Saturday June 5th, 8:25 pm. Shelley, ID. f13, shutter speed 1/80, Canon 7d, ISO 400
6. Tractor. Sunday June 6th, 12:45 pm. Shelley, ID. f13, shutter speed 1/200, Canon 7d, ISO 200
7. Adam. Monday June 7th. Rexburg, ID. f6.3, shutter speed 1/125, Canon 7d, ISO 400

This was a challenging assignment because while some days were easy to find something cool to shoot, others were a challenge. I didn't mean to do two flower pictures but I thought both of them turned out well and I just love all of the blossoms on the trees.
For the first shot I did a vintage type effect to give it that coloring effect. For the car picture I bootsted the colors, contrast, etc to give it more vibrance.
The blossom picture, I just added some sats, levels. For the flag picture I used the exposure tool in camera raw to make the glowing effect around the edges of the flag. For the windmill I just used a small f stop to get that kind of silhouette look but you can still see details on the windmill. I really loved the old tractor but I didn't want to do a lot of editing so I just did levels and boosted the sats. For the picture of my husband I only did levels and then just touched up his skin a little.

Monday, May 31, 2010

Portraits (Enhancements)


1. Carson & Taylor; 5/18/10; 6:00 pm; Rexburg, ID; f6.3; 1/125; ISO 250; Canon 7d
You can't really tell on blogger (very much) but I thought the Match Color trick worked really well even with a completely different picture entirely. I had never used this tool before so I had to mess around with the sliders but I thought it warmed up the picture nicely.

Original


Match Color Picture Used


Original


Edited


Clarke; 5/30/10; 2:00 pm; Birch Creek, ID; f7.1; 1/200; ISO 250; Canon 7d
For this picture of my brother I evened out his skin, enhanced his eyes (realistically), and whitened his teeth (just a tad). We were camping so his hair wasn't done but I still thought the picture looked nice. I also added a vignette and boosted the contrast in camera raw.

Original


Edited

Zach, Oscar, and Chalee
5/31/10, 2:00 pm, Gardens; f5.0; Shutter Speed 1/200; ISO 100; Canon 7d

For this picture I wanted to make their clothes match a little bit better. They were all wearing yellow but Oscar's shirt was a little too bright so I changed the color of yellow it was and Chalee's shirt under her jacket was clashing a little (as well as the writing on her jacket so I changed it to blue to match oscar's overalls. I thought the results turned out well.

Portraits

Group Shot

The Bennetts; 5/31/10; 1:50 pm; The Gardens; f5.6; Shutter Speed 1/125; ISO 100; Canon 7d

Ryker; 5/31/10; 3:00 pm; Rexburg; f8; 1/125; ISO 100; Canon 7d

Bre, 5/21/10; 1:25 pm; Bannack, MT; f5.6; Shutter Speed 1/250; ISO 100; Canon 7d
I didn't have to do hardly anything to this picture because Bre is already gorgeous. Boosted the contrast and enhanced her eyes.

Environmental Portraits

1. Clarke, 5/30/10, 1:21 pm; Birch Creek, ID; f13, Shutter Speed 1/160, ISO 100
My brother is the outdoors hunting fishing type of guy so I chose to photograph him in his "element" or "environment." We went camping to Birch Creek this weekend and went on a long four-wheeling ride. We got to the top of this mountain and it over looked the valley so I made him pause for a photo-op. I did a vintage effect to this picture as well.


Kabe; 5/1/10; 4:00 pm; Shelley, ID; f 5.6; Shutter 1/200; ISO 100; Canon 7d
I took my cousin Kabe's senior pictures. For some reason I like it when guys don't smile in pictures. I don't know why. I thought the color of his shirt and the lighting really brought out his eyes. I only added a little levels and contrast to this picture.

Tuesday, May 25, 2010

HDR


1. Old Cabinet. 5/21/10. Bannack, MT; Canon 7d, ISO 200
2. Old Necklace. 5/21/10. Bannack, MT. f5.6, 1/125, Canon 7d, ISO 200
I loved the colors of this cabinet and thought the colors complemented each other really well. I took it into HDR and boosted it. I thought it looked really cool.

I put the necklace I was wearing (which was my grandmothers necklace so it has a nice old vintage look). I put it on the window seal thought the lighting looked really cool. I took it into HDR and did some color matching and increased the dramatic light strengh.

Macro Abstract


1. Old Truck Texture. 5/21/10; 10:30 am pm; Abandoned trailer park dubois, ID; f8; 1/250; Canon 7d; ISO 500
2. Bottle: 5/21/10; 9:30 am; Old Warehouse, Dubois, ID; f5.6; 1/125; Canon 7d; ISO 2000

I love the texture of the old truck. The colors were awesome and the rust and scratch looking marks made it even better. I just did a simple blend with these two photos by using an overlay blending mode and using a mask to mask out a couple of spots on the picture.